在安裝一套 Oracle 資料庫之前,有幾項是必須先規劃考量的:
※ 決定本機資料庫名稱,以及資料庫所在網域。
※ 規劃所需建立的表格空間 ( Tablespace)。
※ 決定資料庫字元級。
※ 決定理想資料庫區塊大小,例如一般用途資料庫之區塊大小為8k,用於資料倉儲則設置為 32k。
※ 備份方式與備份保留策略。
※ 規劃安裝資料庫與放置資料檔的目錄位置。
※ 規劃資料庫所使用的儲存方式,例如使用 filesystem 或是使用 ASM ( Oracle 在11g版本之後已不支援 Raw Device)。
——————————————————–
Oracle 資料庫對於系統有一定的最低要求,因此安裝之前我們還必須做系統檢查:
※ 至少 1G 實體記憶體 ( 建議至少 2G 或以上 ) 。
※ SWAP size 與實體記憶體相同或是實體記憶體的 1.5 倍,若實體記憶體大於16G,則 SWAP 最大設置為 16G 即可。
※ 1G 的暫時目錄空間。
※ 1.5 ~ 3.5 G 的磁碟空間供 Oracle 軟體使用。
※ 安裝作業系統所需的 patch,以 Linux 5 ,x86 的系統為例,必須安裝下列 RPM :
=======================================
binutils-2.17.50.0.6
compat-libstdc++-33-3.2.3
elfutils-libelf-0.125
elfutils-libelf-devel-0.125
elfutils-libelf-devel-static-0.125
gcc-4.1.2
gcc-c++-4.1.2
glibc-2.5-24
glibc-common-2.5
glibc-devel-2.5
glibc-headers-2.5
kernel-headers-2.6.18
ksh-20060214
libaio-0.3.106
libaio-devel-0.3.106
libgcc-4.1.2
libgomp-4.1.2
libstdc++-4.1.2
libstdc++-devel-4.1.2
make-3.81
sysstat-7.0.2
=======================================
其餘作業系統所需的要求可參閱 Oracle Database Installation Guide。
※ 設定作業系統之 Kernel Parameter ,以 Linux 5,x86 的系統為例,必須於/etc/sysctl.conf 設定下列系統參數:
=======================================
kernel.shmall = 268435456
kernel.shmmax = 4294967295 (建議大於實體記憶體的 1/2 )
kernel.shmmni = 4096
kernel.sem = 250 32000 100 128
fs.file-max = 6815744
fs.aio-max-nr = 1048576
net.ipv4.ip_local_port_range = 9000 65500
net.core.rmem_default = 262144
net.core.wmem_default = 262144
net.core.rmem_max = 4194304
net.core.wmem_max = 1048576
=======================================
設定完畢後執行 sysctl -p 使系統參數生效。
其餘作業系統所需的要求可參閱 Oracle Database Installation Guide。
※ 設置 Oracle 使用者之 Resource Limits ,以 Linux 5,x86 的系統為例,必須設定 /etc/security/limits.conf 如下:
=======================================
oracle soft nproc 2047
oracle hard nproc 16384
oracle soft nofile 1024
oracle hard nofile 65536
oracle soft stack 10240
=======================================
其餘作業系統所需的要求可參閱 Oracle Database Installation Guide。
※ 建立必要的使用者 (如 oracle) 與 群組 (如 dba)。
※ 設置安裝目錄所需的權限。
※ 若為 Windows 環境,只需將 Service pack 更新到最新。
——————————————————–
完成安裝前準備之後,我們便可開始來安裝 Oracle 資料庫,使用圖形介面來安裝 Oracle 資料庫,若為 Unix 平台,必須開啟 XWindow,於安裝來源執行 runInstaller,若為 Windows 平台,則於安裝來源執行 setup.exe。
本次安裝環境為 Linux 5 x86,資料庫版本為 11.2.0.1 ,於安裝來源執行 runInstaller後開始安裝:
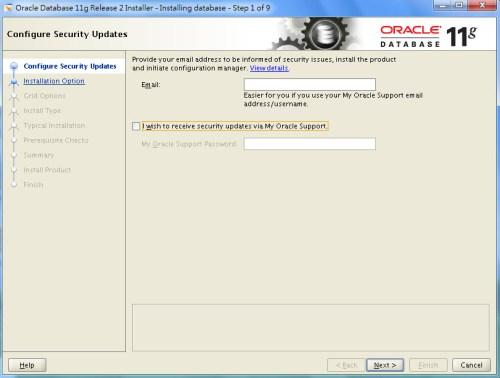
首先為歡迎介面,Oracle 希望我們提供 e-mail 來啟用 Oracle Configuration Manager,若不使用此功能,則將選項取消即可。
這個步驟可選擇在安裝的過程中一併建立資料庫,或是只安裝資料庫軟體。習慣上將安裝資料庫軟體 與建立資料庫兩個步驟分開進行,原因是以往若要安裝最新版本的資料庫時,在安裝完資料庫軟體之後,還必須打上資料庫最新的Patch Set (例如安裝完 10.2.0.1 的資料庫軟體之後再安裝 10.2.0.5 的 Patch Set) ,若在安裝軟體的過程當中一併建立資料庫,則在打完 Patch Set 之後,資料庫還必須做升級的動作,因此習慣上會將資料庫軟體完整安裝後再建立資料庫。
不過到了 Oracle 11g 之後的版本,資料庫的 Patch Set 已經包含了資料庫軟體,也就是說如果我們要安裝 11.2.0.3 這個版本的資料庫,不須先安裝 11.2.0.1 版本再打上 11.2.0.3 的 Patch Set,而是直接使用 11.2.0.3 這個版本的 Patch Set 來直接安裝就好了,所以在這個步驟彈性上可以選擇直接建立資料庫或是單純只安裝軟體,在這邊我們還是先沿用就有的習慣,只安裝資料庫軟體。

接下來選擇的是要將資料庫軟體安裝為 Single Instance 或是 RAC Database,若要安裝為 RAC Database,則事先必須先裝好 Oracle Cluster (10g) 或是 Grid Infrastructure (11g) ,本次安裝的是單機伺服器的資料庫。

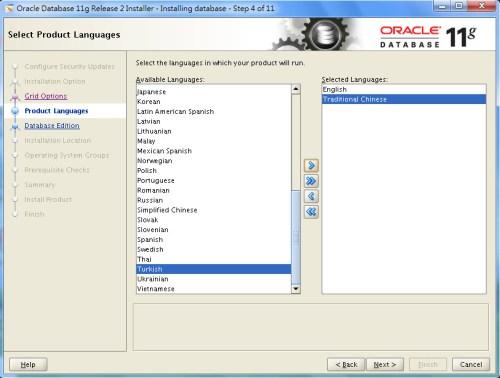
接下來選擇的是資料庫產品的語言類別,這個選項只影響日後開啟 Database Control之後是否能顯示相對應的字元集,例如若想在 Database Control 的網頁上看到中文,則這邊必須將中文編碼給添加進來。
選擇安裝的軟體為企業版、標準版或是 Standard One 的版本。

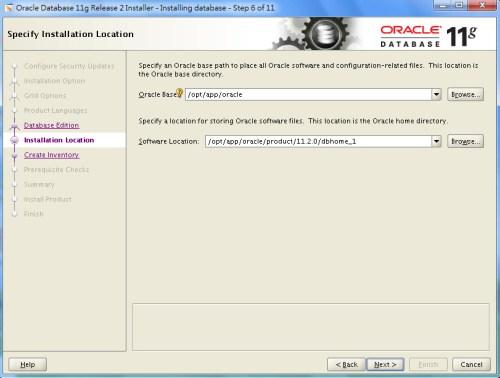
設置 Oracle 基本目錄 ( Oracle Base ) 與 Oracle 軟體的本位目錄 ( Oracle Home) ,Oracle Base 的預設格式為 “軟體裝載目錄 + 標準目錄名稱 + 軟體擁有者" ,因此若我們使用 oracle 這個使用者將資料庫軟體裝載於 /opt 底下,則預設的 Oracle Base 位置為 /opt/app/oracle 。
Oracle Home 的預設格式為 " Oracle Base + product + 軟體版本 + 軟體種類" ,本次安裝的是 11gR2 的資料庫軟體,因此預設的 Oracle Home 位置為 /opt/app/oracle/product/11.2.0/dbhome_1 。
若系統為第一次安裝 Oracle ,則必須設定產品目錄( Oracle Inventory) 存放位置 。
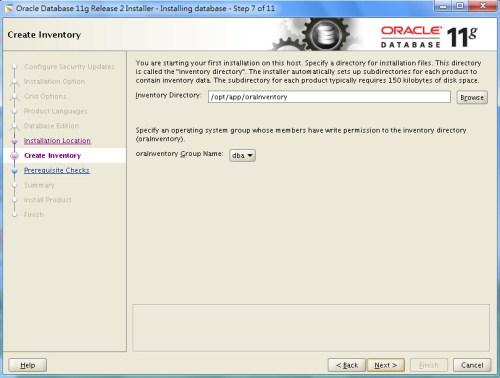
指定作業系統群組,一般為 oinstall 或是 dba。

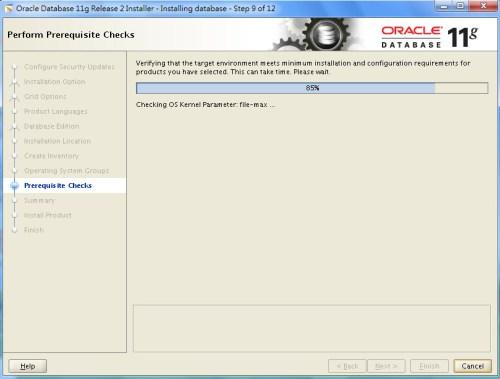
接下來會進行作業系統檢查,若檢查出參數設定有遺漏,在 11g 這個版本提供了 Fix Script 方便我們快速調整作業系統參數。
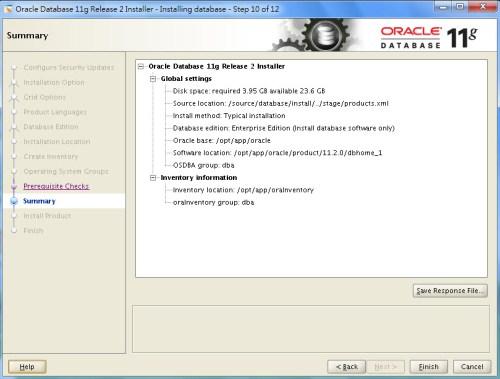
檢查完畢之後會有摘要畫面來提醒我們這次安裝的內容,然後開始進行安裝。
安裝完畢之後,系統會提醒我們要使用 root 來執行兩個Script , orainstRoot.sh 與 root.sh :
執行 orainstRoot.sh 會將目錄的權限做變更:
=============================================
[root@linuxdb oraInventory]# /opt/app/ora Inventory/orainstRoot.sh
Changing permissions of /opt/app/oraInventory.
Adding read,write permissions for group.
Removing read,write,execute permissions for world.
Changing groupname of /opt/app/oraInventory to dba.
The execution of the script is complete.
=============================================
執行 root.sh 會於作業系統添加 dbhome、oraenv、coraenv 三個執行檔,另外於 /etc 之下建立 oratab 檔案:
=============================================
[root@linuxdb ~]# /opt/app/oracle/product/11.2.0/dbhome_1/root.sh
Running Oracle 11g root.sh script…
The following environment variables are set as:
ORACLE_OWNER= oracle
ORACLE_HOME= /opt/app/oracle/product/11.2.0/dbhome_1
Enter the full pathname of the local bin directory: [/usr/local/bin]:
Copying dbhome to /usr/local/bin …
Copying oraenv to /usr/local/bin …
Copying coraenv to /usr/local/bin …
Creating /etc/oratab file…
Entries will be added to the /etc/oratab file as needed by
Database Configuration Assistant when a database is created
Finished running generic part of root.sh script.
Now product-specific root actions will be performed.
Finished product-specific root actions.
=============================================
執行完兩段 script 之後便完成了 Oracle 資料庫軟體的安裝。

———————————————————————
若為 Unix 平台,則安裝後須設定軟體擁有者的環境變數,設置 profile 如下:
umask 022
ORACLE_BASE=/opt/app/oracle
ORACLE_HOME=/opt/app/oracle/product/11.2.0/dbhome_1
ORACLE_SID=orcl (依未來建立的資料庫做改變)
NLS_LANG=AMERICAN_AMERICA.UTF8 (依未來資料庫設置的字元集做改變)
PATH=$ORACLE_HOME/bin:$PATH
export ORACLE_BASE ORACLE_HOME ORACLE_SID NLS_LANG PATH
若為 Windows 平台,則必須將軟體擁有者加入本機安全性原則中的 “以批次工作登入" 的群組當中,否則未來無法透過網頁 (Database Control) 進行作業系統認證。

沒有留言:
張貼留言